How to Make Fantastic Bubble Hash from Bud or Trim
Bubble hash (also known as “ice hash”) refers to collecting hash from your weed (or trim) by submerging the weed in ice-cold water and agitating it. This causes trichomes to break off so you can collect them.
Whenever you hear the word ‘hash’, it’s just referring to the extracted resin glands (trichomes, the sticky sparkly stuff) of a cannabis plant. The ‘bubble’ part refers to the method of using cold water and agitation to extract that resin.
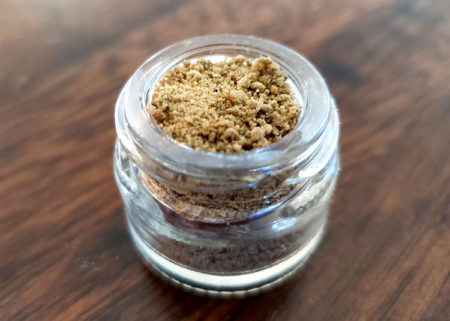
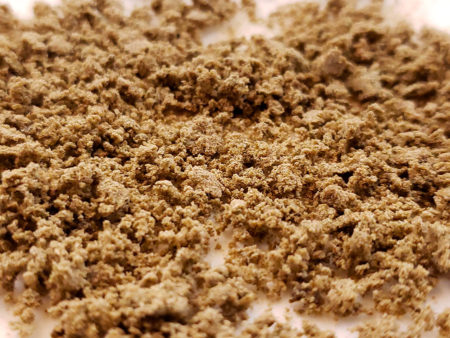
Cannabis bubble hash has a gold crumbly appearance
Why make Bubble Hash?
- The perceived potency of bubble hash is just…great! In my opinion, it feels noticeably stronger than dry-sift, kief or dry-ice hash
- Bubble hash is safe to make since there are no flammable ingredients or chemical reactions when making it
- It’s also safe to enjoy as no chemicals are used during the extraction process
- It’s a great use of trim, though making dry-ice hash is easier and produces bigger yields
The main reason to make bubble hash (in my opinion) over other types of hash is that the perceived potency is higher. The effects simply feel “stronger” than most other cannabis concentrates. If that’s what you want, bubble hash is amazing!
3 Main Methods to Mix Up Your Hash
The cornerstone of making bubble hash is mixing up your weed, water and ice. All three of these methods produce the same quality of bubble hash. It’s the efficiency and amount of work that varies.
- (Old School) Manual Method: Using a spoon or rubber spatula and hand mixing for a while.
- Pros: Cheapest method, needs the least amount of tools.
- Cons: The most physical work and the least efficient. You will get a workout!
- Mixer Method: Using a hand mixer with beaters attached, or a hand drill with a paint-mixer or similar tool attached.
- Pros: Many people have most of the tools needed. This method is much easier than hand-mixing and more efficient.
- Cons: Still need a drill or mixer plus a good mixing attachment that’s also long.
- A hash-washing machine (mini washing machines)
- Pros: Easiest method since you don’t have to mix. Also, the most efficient method since all the material is constantly mixed while the machine is on.
- Cons: High initial cost since you have to buy the machine (~$110).
Here’s a short video of a washer in action
Supplies
- Two 7lb bags of ice
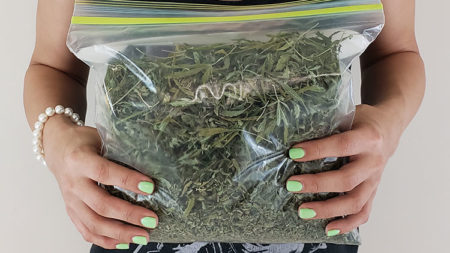
- Your dried cannabis (bud or trim)
- Bubble Hash Bags with 25-micron drying sheet (preferably all-mesh)
- Tip: Get a pack of 25-micron drying screens and dry each of your various grades of hash on their own sheet. This makes it way easier to dry and keep your grades separated.
- Manual (Mix by Hand): A long cooking spoon or a rubber spatula, some patience, and calories to burn.
- Hand Mixer or Drill: A hand-mixer (like you would use for cakes) with beaters attached, or a hand drill with a paint mixer attached
- A hash-washer. These are usually sold as “mini washing machines” and they’re pretty good for that, too. We use the “bubblebagdude” washer since it’s specifically designed to make bubble hash.
Alright, let’s make some bubble hash!
How to Make Bubble Hash with a Hash Washer (The Easier Method)
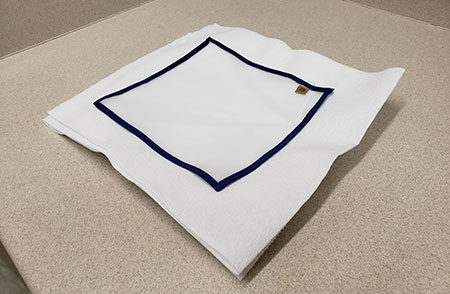
- Set your 25-micron drying screen(s) on some paper towels and set them aside. This is where your hash will dry.
- Your washing machine came with a 220-micron bag, which you will layer with ice and cannabis. Put ⅓ of the bag of ice in the bottom of the bag, add your cannabis, and then another ⅓ of the bag of ice on top. Close the 220-micron bag and use the string attached to the bag to tie the zipper closed. Place the closed bag into the washing machine.
- If your machine didn’t come with a 220-micron bag that fits inside, just layer the ice and cannabis directly in the machine. You can filter it later.
- Put the final ⅓ of ice into the machine. Double-check to make sure the bag inside is completely closed and tied before the next step or all your cannabis will come out of the bag into the washer.
- Top off the machine with water. There should be a mark on the side of the washing machine that tells you how high the water should go. Fill it to below the low mark with cold water. When we’ve filled it to the high mark we’ve had it leak out the back once everything starts mixing and churning. Even at the low mark, there can still be too much water after a bit of the ice melts.
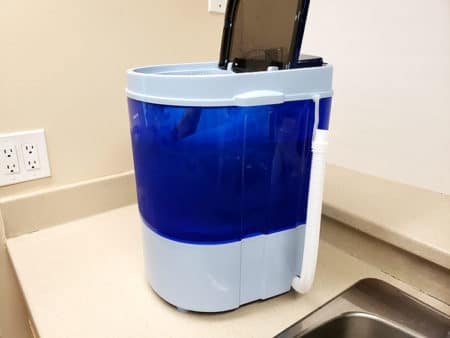
- Set the machine to mix up your cannabis for 12 minutes and wait for the cycle to complete.
- Let the machine sit for another 10 minutes afterward to let the trichomes sink to the bottom. Move on to the next step while you wait.
- Grab the unused bucket and stack the remainder of your bubble bags inside. First insert the bag with the lowest number (25-micron), then put the next biggest (73-micron) bag inside that, and finally put the (160-micron) bag inside that. If you didn’t use a 220 bag in the washer, or if plant material somehow escaped your bag while in the washer, you’ll need to lastly insert a 220 bag, which will filter away the larger plant matter.
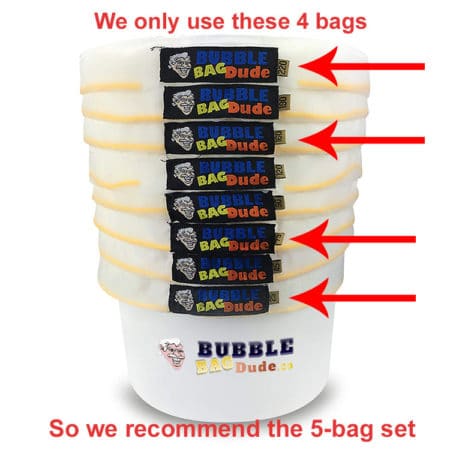
- Note: Some bubble bag sets come with 5 bags and some come with 8. We use the 5 bag set, but we don’t use all of the bags that come with it. All bag sets come with 25, 73, 160 and 220, but the size of the other bags differ depending on who’s selling them. Some sets come with a 45, 90, or 120 and many growers like to use those bags. However, we only use the 25 (good stuff) 73 (the best stuff), 160 (not bad stuff), and 220 (cleans out the junk) bags. The most important thing is to start with 25 and make sure each bag after that goes up in number.
- Pour the weedy water from your washer into the bucket containing your stacked bubble bags. Your washer has a tube meant to dispose of old water; this is perfect for pouring your weed-water into the stacked bags. You might need to suck on the tube a little to start the siphon.
- If you had to add the 220 bag, lift that out before the next step. The 220 bag will remove the large bits of leaf and other plant matter. Keep this plant matter because you will run it through the whole cycle again.
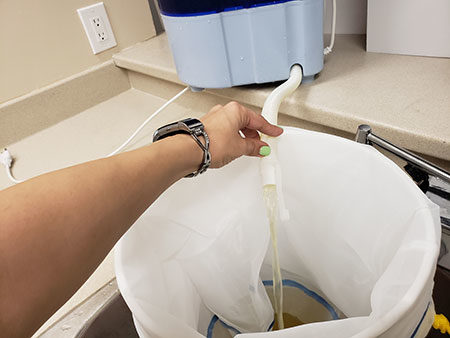
- Allow the water to drain through the 160 bag for a few seconds.
- Carefully pull up just the 160 bag and place it into the empty, clean work bucket.
- Use your sprayer (or mister/cup) to wash the hash towards the center of the bag.
- Carefully pull the edges of the bag down over the bucket until the bottom of the bag (where the hash is) is stretched across the opening of the bucket.
- Use a metal tablespoon to collect the wet hash and place it on the drying screen. This is your first bit of bubble hash! Don’t worry, there’s still a lot more.
- Remove the 160 bag from the bucket and set it aside.
- Repeat for the remaining bags, removing each one slowly one at a time and collecting the hash, ending with the 25 bag. I always try to label which hash is which so I can compare them later.
- First run complete! The next step is to do a second run with the same bag of plant matter. Yes, do everything again. You essentially want to repeat the entire process to get more hash that hadn’t been released yet.
- Repeat steps 2-15 to complete your second run (add ice, water, and the plant matter bag back in the washer, run it again for 12 minutes, let it sit for 10 minutes, then put the resulting water through the series of bags again to collect more hash). In some cases, the second run can yield as much as the first run, so don’t skip it!
- Once you’re done with your second run, use the tablespoon to chop up all your hash into tiny bits. Let it dry out for 30 min and chop it up again. Make sure it’s in tiny bits! Continue this process 2 more times. You’re doing this to help it dry out faster, prevent clumping – and more importantly – prevent mold.
- If it’s chopped up enough, your hash should be ready to use within 1-2 days.
- Tip: I pointed a tiny fan (like this one) at the drying hash from about 5 feet away on the low setting. It’s not enough power to move the hash even when it’s dry, and the hash is completely dry and ready to use in a few hours!
- You now have a bunch of great hash! Enjoy and let us know how it went for you!

Don’t have a washer? Want to make bubble hash by hand? Learn how below!
(Manual Version) Make Bubble Hash with a Mixer, Drill or by Hand-Mixing
Making hash with a drill, mixer or by hand-mixing is the same process as with a washing machine. The only difference is that you will agitate everything with a power tool (or by hand) and pre-filter your hash-water with a 220-micron bag before filtering out your hash.
Replace steps 2-8 above with these instructions:
- Place your 220-micron bag inside one of your two buckets. This is now the ‘work bucket’.
- Next, add several layers of ice and marijuana trim or buds. First put a layer of ice at the bottom of the bag, then half your cannabis/trim, then another layer of ice, then the remainder of your cannabis and top off with a final layer of ice.
- Add enough water to make the ice on top float.
- Let this mixture sit for 20 minutes so all that good stuff (trichomes) get nice and cold.
- Use your mixer or drill on a low setting to mix up the ice water and cannabis for about 10 minutes. Keep in mind that you’re not trying to blend the mixture into some sort of smoothie, you just want to agitate the mixture to get the trichomes to fall off.
- Most drills/mixers won’t be able to reach the bottom of your bucket. Make sure to mix everything up with your hand or a big spoon a few times so the stuff on the bottom gets some love, too.
- Let everything sit for another 10 minutes after mixing to let the trichomes sink down via gravity.
- Close up the top of the 220 bag with your hands. Then, pull the bag up and let the water drain through the mesh.
- Once the water has stopped draining, squeeze the remaining water out of the work bag (220), then place the bag of plant matter in a big bowl or container. That cannabis is going to get used again so don’t toss it yet!
- Grab the unused bucket and stack the remainder of your bubble bags inside. First insert the bag with the lowest number (25-micron), then put the (73-micron) bag inside that, and finally put the (160-micron) bag inside that.
- Pour the weed-water from your work bucket into the bucket with your stacked bubble bags. You may want to use a little water to rinse the sides of the work bucket to get any trichomes stuck to the sides of the bucket.
- Now you’ve done everything the washer would have done. Go to step 9 above and continue the tutorial.


